Showing posts with label embossed. Show all posts

Wednesday, May 14, 2014

Bottoms Up Layout with Alyssa McGrew

Bottom's Up Layout
Curtsey Boutique Designer
Alyssa McGrew

Today's 12x12 layout comes from Alyssa McGrew. I love how she uses our pennant labels to build layers into her layout - they are so much more affordable than the stickers out on the market and you can print or stamp anything you like on them.

It seems that Alyssa's daughter has found even milk to be a special treat when enjoyed from a pretty glass.


Curtsey Boutique Supplies


To see more of Alyssa's work, visit her blog by clicking on her photo below.

Monday, March 24, 2014

DIY Berry Basket Holder Shadow Box Tutorial with Lisa Spiegel

Berry Basket Holder Tutorial
Original Design : Lisa Spiegel


Lisa shares this ingenious tutorial for creating a shadow box display piece from two of our berry baskets. 

1. Cut a slit in the first berry box, then remove the top half of the box following that line.

2. Using twine, tie the basket you cut to another full size basket creating a clam shell appearance.
.

3. Stuff a muslin bag with pillow stuffing and tuck in the bottom basket.  Hot glue red doily to the top basket.


4. Hot glue Fabric Flower, Twine tied button, Felt Flowers and Glassine Leaves punched from Glassine bag to top basket.

5. Fold Glassine bag up two times from the bottom edge.  Use stick pin to attach it to the muslin pin cushion.  Adhere wallet sized photo to the front.


6. Pull apart Red Fabric flower to reveal fabric strip.  Tie around the berry basket and embellish with pins.  Pin Burlap Butterfly to the pin cushion.  Enjoy!


Curtsey Boutique Supplies:


Other Supplies:
Pillow Stuffing
Maya Road Stick Pins
Twine


To see more of Lisa's work, click on her photo below.

Monday, February 10, 2014

Wintery Muslin Treat Bag with Jenifer Cowles

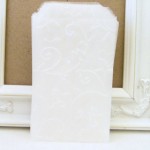
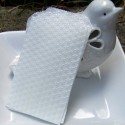
Wintery Muslin Treat Bag
Curtsey Boutique Designer
Jenifer Cowles
Project Instructions:

1. Using the muslin bags in the shop spray with some silver color wash. 

2. Layer a doily, some wax paper garland, a fancy silver ribbon, a blue circle and top it all off with a snowflake rosette.  

3. Cut a v into a embossed coin envelope and attach that to the underside of the doily, making it look like a nice pretty ribbon.

4. To make the wax paper garland fold several layers of  wax paper about 2” wide and cut multiple cuts about ¼” apart and using a jumbo zot adhere it in a circle giving your snowflake medallion some dimension.

Curtsey Boutique Supplies


Thanks for taking a peek today!  To see more of Jenifer's work, please visit her blog by clicking on her picture below.

Thursday, January 2, 2014

Altered "Love" Embroidery Hoop by Jenifer Cowles

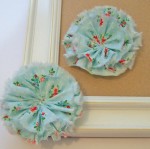
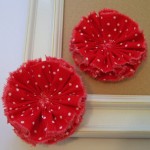
Altered Love Embroidery Hoop
Curtsey Boutique Designer
Jenifer Cowles


A quick walk through my local department stores this week revealed that everyone is getting ready for Valentine's Day. It seems scarcely possible with the ground still littered with fire work remnants, but there it is - red, pink and white hearts everywhere.

I thought we'd hop on the band wagon instead of fighting the love avalanche. Jenifer's altered embroidery hoop is a charming decoration to hang at home or give to a friend.


Curtsey Boutique Supplies


Thanks for taking a peek today!  To see more of Jenifer's work, please visit her blog by clicking on her picture below.

Thursday, December 19, 2013

Point and Shoot Layout with Alyssa McGrew

Point and Shoot Layout
Curtsey Boutique Designer
Alyssa McGrew
We are taking a brief pause from all the holiday festivities to share this lovely layout by Alyssa.

Alyssa shares, "My brother took this amazing photo of my nephew, and it just begged to be scrapped.  I wanted to created a layout with lots of layers without detracting from the photo.  My stash of perfectly neutral products from the store fit the need perfectly."  


Curtsey Boutique Supplies


To see more of Alyssa's amazing  work, visit her blog by clicking on her photo.


Monday, April 8, 2013

DIY Paper Bag Album Tutorial with Shellye McDaniel


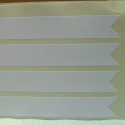
DIY Paper Album Bag Tutorial
Curtsey Boutique Designer
Shellye McDaniel
Shellye is sharing the most adorable brag book with us today. And do you recognize the image on the cover - its from one of our Freebie Fridays!  Just click on the picture below in the supply list to be taken to where you can download it.


Step-by-Step Instructions


1.  Using five of the flat 5x7.5 Kraft Bags, stack them together by alternating  open end, closed end, open end.


2. Fold the bags in the center.  

3.  Machine stitch (or hand-stitch using a book-binding technique) down the center of the stack of paper bags. 

4.  Add doily pieces, tags or tabs to the opening of the bags.  

5. Cut desired patterned paper down to the size of each page and embellish as desired.  

This would make the perfect brag book for Grandma and makes such a nice addition to a coffee or end table!


Curtsey Boutique Supplies


To see more of Shellye's amazing creations visit her blog, Papered Cottage, or click on her image below.