|
| You are My Happy Altered Photo Frame Curtsey Boutiqu Designer Raechelle Bellus |
It is so exciting to introduce you to all the new talent we have joining our team this Spring!
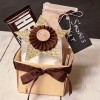
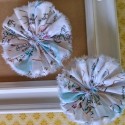
A big welcome to Raechelle Bellus as she debuts her first project her on the blog. Also debuting is our new Parisian Map ruffle flowers. I love the print on this flower - the whimsical pencil drawings of Parisian land marks and light colors are perfect for Spring projects. Raechelle embellished her flower with our wood buttons and a bit of twine, a punched heart and a gold sequin.
A big welcome to Raechelle Bellus as she debuts her first project her on the blog. Also debuting is our new Parisian Map ruffle flowers. I love the print on this flower - the whimsical pencil drawings of Parisian land marks and light colors are perfect for Spring projects. Raechelle embellished her flower with our wood buttons and a bit of twine, a punched heart and a gold sequin.

Materials:
patterned paper: MME, EP
patterned paper: MME, EP
words: Teresa Collins
sequins: Hazel & Ruby
twine: Target dollar bin
gold paint: Martha Stewart
frame: Melissa Frances
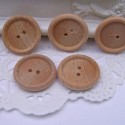
Curtsey Boutique Supplies
 |  |