
 |
| DIY Embroidery Hoop Advent Calendar Tutorial Curtsey Boutique Designer Rebekah Faries |
When I opened the front door this morning it was awfully brisk, and my parents up north just got snow! It is hard to believe it is officially Spring. The cool weather had be thinking more of the holidays than the beach, so what better time to reflect back on the delights of wintery weather and share this lovely advent calendar tutorial courtesy of Rebekah?
Project Instructions
1. Paint a large embroidery hoop with white paint.
2. Once dry trace the inside of the hoop onto thick cardboard and cut out making sure it fits snugly inside the hoop.
3. Use cardboard as template to trace onto fabric of your choosing leaving a 2-3 inch border around the
outside.
4. Cover the cardboard circle and secure one side of the fabric to the cardboard circle.
Stretching the fabric around as you go, glue to the backside of the cardboard circle until it is all
glued down and the front side is completely taught and has no wrinkles. Insert into embroidery
hoop

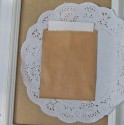
2. Gather envelopes, glassine bags, muslin bags and other items of your choosing making sure
you have 24 in all. Space evenly around your hoop. Embellish your bags and tags with
snowflakes.
* Use washi tape to decorate the bottoms of the white shipping tags. Wrap with twine and stamp
names on them.
*Use die cuts to embellish glassine bags and kraft bags. Use a decorative punch to punch out
the tops of the journal cards.
*Add fun glitter or confetti to glassine bags and secure with washi tape. Secure to your embroidery hoop with thumb tacks.
Other Supplies:
Washi Tape Recollections
Kraft Envelopes Recollections
Bottle Brush trees and wreaths
Thumb tacks
18” embroidery hoop
Fabric
Glue gun and glue
Glitter

Curtsey Boutique Supplies


No comments:
Post a Comment
I love feedback and appreciate the time it takes you to leave it :)