Showing posts with label glassine. Show all posts

Friday, August 15, 2014

Birthday Tag Bag with Jenifer Cowels

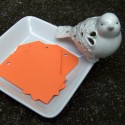
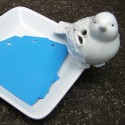
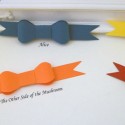
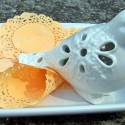
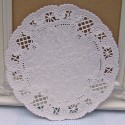
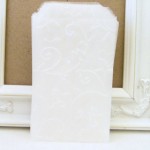
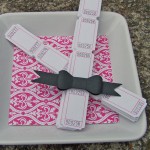
Jenifer Cowels had this to say about today's gorgeous project: "I needed a fun way to give a little gift card.  I put together this little bag/tag/card, the tag slides in and you could adhere a gift card to it and still have enough room to write a greeting and note.  I am so happy with how this turned out I know I will be making more in my future."


Thanks for sharing this beautiful project with us, Jenifer!

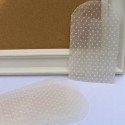
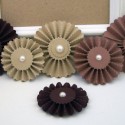
Supplies from the Curtsey Boutique Shop:

Wednesday, July 16, 2014

Vintage Envelope Project with Rebekah Faries

Check out today's gorgeous project from DT Member Rebekah Faries!  Rebekah created these envelopes as a multi-function greeting card or gift card wrapper to keep on hand for a variety of last-minute needs.  The envelopes contain a simple die-cut sentiment that is appropriate for a variety of occasions, making this project perfect for weddings, baby showers, love notes, and more.

Rebekah wrapped some of our Glassine Envelopes with 5-Inch Doilies, then embellished them using Baker's Twine and buttons.  The result is completely charming, don't you think?

You can purchase all the items needed to make this versatile envelopes in our shop.


You can visit Rebekah's blog by clicking HERE.


Friday, May 16, 2014

Welcome Kristin Greenwood

The Best Things in Life Aren't Things Layout
Curtsey Boutique Designer
Kristin Greenwood
 It is so exciting to be welcoming all our wonderful new talent to the team. One of the best parts of the Curtsey Boutique's growth is getting to share how are products are used by others.  Kristin's lovely layout is chock full of Curtsey Boutique goodness, I hope you enjoy all the lovely details as I much as I did.


Curtsey Boutique Supplies


To see more of Kristin's delightful work visit her blog by clicking on her image below.


Monday, April 14, 2014

Wherever You Go Bring Your Own Sunshine Layout by Lisa Spiegel

Wherever You Go Bring Your Own Sunshine Layout
Curtsey Boutique Designer
Lisa Spiegel
Layering is one of the best ways to create interest on a page, and I like to use not just paper but several types of products to create that fun layered look. I love how many there are to choose from with Curtsey Boutique!

My process goes like this...I select my photo or photos and then I usually pull all my embellishments first, trying to find some that match my photo.  Then I'll select a background paper. 


In this case, I chose a retired Sassafras Lass paper because I loved the clouds which I felt help tell the story of my photo of my daughter and her friends on a rainy day.  Then I started layering.  

First, I choose papers.  In this case, I chose a vellum and tape measure paper.  I started tucking things in like the sunshine, a Glassine bag (I cut it in half and tucked in top and bottom for the illusion of a larger bag), a doily (also cut in half and tucked top and bottom), and some tulle ribbon.  

I decided to embellish the corner of the flower girl with a Garland Flag, a doily and a Round Tag. (I thought she was so cute with her daisy umbrella and sunny disposition.  She totally echo'd my daughter's and her friend's faces while they ran to class in the rain.)   

I used my Silhouette to create my title and backed it with the polka dot paper.   I created a custom sunshine with my trusty zig zag scissors and my sewing machine and used it to highlight the word Sunshine for the title.  A few dew drops, some vellum circles and a clothespin all add even more dimension.  

The last little touch is some random thread, I love how thread softens the look of papers.  As always I added some journaling to tell my story...I just don't think a page is finished without journaling!  

I hope you've enjoyed this little look into my layering process and would love to see your take on layering..be sure to stop by our Facebook Fan page and share your pages with us!!

Curtsey Boutique Supplies


To see more of Lisa's work, click on her photo below.

Monday, March 24, 2014

DIY Berry Basket Holder Shadow Box Tutorial with Lisa Spiegel

Berry Basket Holder Tutorial
Original Design : Lisa Spiegel


Lisa shares this ingenious tutorial for creating a shadow box display piece from two of our berry baskets. 

1. Cut a slit in the first berry box, then remove the top half of the box following that line.

2. Using twine, tie the basket you cut to another full size basket creating a clam shell appearance.
.

3. Stuff a muslin bag with pillow stuffing and tuck in the bottom basket.  Hot glue red doily to the top basket.


4. Hot glue Fabric Flower, Twine tied button, Felt Flowers and Glassine Leaves punched from Glassine bag to top basket.

5. Fold Glassine bag up two times from the bottom edge.  Use stick pin to attach it to the muslin pin cushion.  Adhere wallet sized photo to the front.


6. Pull apart Red Fabric flower to reveal fabric strip.  Tie around the berry basket and embellish with pins.  Pin Burlap Butterfly to the pin cushion.  Enjoy!


Curtsey Boutique Supplies:


Other Supplies:
Pillow Stuffing
Maya Road Stick Pins
Twine


To see more of Lisa's work, click on her photo below.

Tuesday, March 18, 2014

Aspire to be the Best Layout with Connie Mercer

Aspire to be the Best Layout
Curtsey Boutique Designer
Connie Mercer

Connie shares a layout filled with lovely layers today. (Say that 3 times fast)  Her embellishment groupings are soft and feminine and include our glitter ballerinas, felt doilies, polka dot envelopes and blank raffle tickets.


Curtsey Boutique Supplies


Other Supplies

Little Yellow Bicycle paper
American Crafts
Creative Imaginations (thin jute)
Cosmo Cricket  (pink mini letters)


 You can see more of Connie's lovely work by clicking on her photo.