Showing posts with label roses. Show all posts

Monday, March 24, 2014

DIY Berry Basket Holder Shadow Box Tutorial with Lisa Spiegel

Berry Basket Holder Tutorial
Original Design : Lisa Spiegel


Lisa shares this ingenious tutorial for creating a shadow box display piece from two of our berry baskets. 

1. Cut a slit in the first berry box, then remove the top half of the box following that line.

2. Using twine, tie the basket you cut to another full size basket creating a clam shell appearance.
.

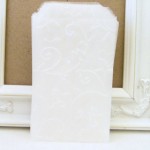
3. Stuff a muslin bag with pillow stuffing and tuck in the bottom basket.  Hot glue red doily to the top basket.


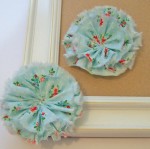
4. Hot glue Fabric Flower, Twine tied button, Felt Flowers and Glassine Leaves punched from Glassine bag to top basket.

5. Fold Glassine bag up two times from the bottom edge.  Use stick pin to attach it to the muslin pin cushion.  Adhere wallet sized photo to the front.


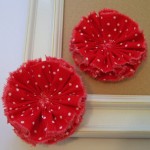
6. Pull apart Red Fabric flower to reveal fabric strip.  Tie around the berry basket and embellish with pins.  Pin Burlap Butterfly to the pin cushion.  Enjoy!


Curtsey Boutique Supplies:


Other Supplies:
Pillow Stuffing
Maya Road Stick Pins
Twine


To see more of Lisa's work, click on her photo below.

Friday, November 1, 2013

Fall Decor Pumpkins with Connie Mercer

Halloween may be over, but there's still time to squeeze in a few more fun fall decor projects!  Curtsey Boutique DT Member Connie Mercer shares with us these perfectly decorated pumpkins that would be a wonderful addition to your Thanksgiving decor.


Connie used our candy corn inspired blooms on this pumpkin, as well as some rolled felt roses for lots of texture.  You can see our selection of flowers for your holiday projects in the shop by clicking here and here.

You can see more of Connie's work by clicking on her photo.


Friday, October 4, 2013


Burlap Wall Hanging
Curtsey Boutique Designer
Andrea Amu


For this project, I created a woven burlap and twine wrapped monogram wall décor piece with a decorative frame. 


After I completed my project, the felt flowers and doily from Curtsey Boutique were the perfect finishing accents for my initial! 


Curtsey Boutique Supplies


To see more of Andrea's beautiful work, you can click on her photo to visit her blog.

Friday, February 15, 2013

My True Love Card by Jess Mutty


My True Love Card
Curtsey Boutique Designer
Jess Mutty 


I'm in the mood for romance this month and there are so many gorgeous offerings in the Curtsey Boutique shop to help create that mood.  Pretty ribbon, delicate doilies, and soft flowers have me feelin' the love!

I used soft pinks and grays on this card and the focal point is the canvas dress form on top of the gray doily.  I tied a pink seam binding bow around the waist. I also love the subtle embossed Xs and Os on the white tag.

And of course no Valentine can be complete without roses.  These rolled felt roses add the perfect dimension and texture to a card. 

Curtsey Boutique Supplies 


To see more of Jess' fantastic work visit her blog, The Examined Life, or click on her picture below.


Tuesday, January 8, 2013

Love Birds Congratulations Gift Bag by DT Member Shellye McDaniel

Love Birds Congratulations Gift Bag
Curtsey Boutique DT Member
Shellye McDaniel

 Happy New Year!

I am excited for all 2013 has to offer. This post marks the first for our new Design Team. The blog will be so much busier from now on and full of lovely inspiration - I hope you enjoy it.

First up is this charming Gift Bag by Shellye McDaniel and a tutorial on how she created it.

1.  After printing the 'love birds' image, use a 2.5"circle punch to cut out the design; adhere to the center of the doily.  

2.  Stamp sentiment onto a piece of cardstock, trim and add to bottom portion of image.  

3.Machine-stitch around the perimeter if desired.  

4.  Using a Ballpoint-Tip Glue Pen, attach a border of brown/white baker's twine around the edge of the image.  

5. Line the top of the doily to just under the hole of the shipping tag and attach with adhesive or glue dots. 

6. Next, attach the paper bow to the top of the doily using adhesive, foam dot or glue dot.  

7. Cluster two white felt roses to the side of the image (or center, if desired) and add a button or pearl to the center or leave plain.  

8.  Hand-cut or use a leaf punch to fashion a couple of leaves. 

9. Before tying the tag onto the paper bag, fold over the opening of the bag to create a flap.  

10.  Using the hole of the shipping tag as a guide, punch a hole into the top of the bag.  

11.  Tie tag on with a length of brown/white baker's twine.


Little gifting bags are perfect for holding gift cards, money, small frames or other trinkets.  Have a larger gift in mind?  The Curtsey Boutique has a large supply of different sized boxes, bags and sacks available.

Curtsey Boutique Supplies:
Other Supplies:
-Love Birds Printable (vintagefangirl.com)
-Adhesive Pearls (Recollections)
-Misc. Punched Leaves
-Ballpoint Tip Glue Pen (Martha Stewart)
-"Congratulations" Stamp (unknown source)
-Staz On Timber Brown Ink

To view more of Shellye's work visit her blog, the Papered Cottage, or click on her image below.