Showing posts with label Tutorial. Show all posts

Wednesday, October 22, 2014

DIY Lavender and Wildflower Seed Thank You Packets Tutorial with Tracy McLennon

Lavender and Wildflower Seed Thank You Packets Tutorial

Original Design : Tracy McLennon

Curtsey Boutique Supplies:


Other Supplies:
Mini Ziploc Bags
White Cardstock
Journal Pen
Flower Seeds
Heart and Tag Punch
Patterned Paper

IMG_1702CB.jpg

Lavender and Wildflower Seed Thank You Packets:
This is a sweet and simple project that can be easily made in larger quantities. I created these to be a part of a Garden Party themed bridal shower. They were a part of the Thank You gift for all of the people that attended the shower.

IMG_1679CB.jpg

I cut out all of the hearts and tags from patterned papers. I inked everything with a chocolate brown ink. I also cut small strips of white cardstock which I wrote Thank You on. But you could always print out these sentiments or stamp them.

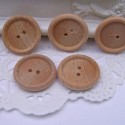
Then I began to assemble the front of each mini envelope. Any regular adhesive will do, but I used my hot glue gun for the buttons.

IMG_1675CB.jpg

I separated the seeds from their original packages and then placed them each into a mini zipper bag. This would make sure that none of the tiny little seeds would escape from the envelopes.

IMG_1681CB.jpg
That’s it! Your quick and easy favours are complete!

You can see more of Tracy's designs by visiting her blog.


Friday, August 29, 2014

DIY Shadowbox Collage Layout Tutorial with Andrea Amu


DIY Shadowbox Collage Layout Tutorial
Curtsey Boutique Designer
Andrea Amu

Today Andrea shares her technique for creating a collage-style layout perfect for displaying inside a shadowbox frame.  Because this project is in a shadowbox instead of an album you can as many layers and textures as you like.


Curtsey Boutique Supplies


Floral Patterned Paper Bow


Other supplies-
cardstock
printed burlap sheet
SEI die-cuts
Cricut Expression and Chalkboard Fonts cartridge
Ranger Paint Dauber
Fine tip marker
My Mind's Eye enamel dots

adhesive

To see more of Andrea's lovely work visit her blog, I'm Living on Scraps by clicking on the link below.


                                                                   I'm Living on Scraps

Friday, August 1, 2014

Paper Bag Album Tutorial with Jenifer Cowles

Today, we have a lovely tutorial to share with you.  DT Member Jenifer Cowles has created a lovely paper bag album, and today she is sharing the instructions with us.  Click on each page to see a larger version.


To see all the supplies Jenifer used from the shop, click HERE.

To visit Jenifer's blog and see more of her designs, click HERE.

Monday, July 28, 2014

Chalkboard Ink Tutorial with Rebekah Faries

Today we have a very fun tutorial to share from DT Member Rebekah Faries.  Click on each page to enlarge it.  To shop for all the Curtsey Boutique supplies Rebekah used, visit the shop HERE.  Enjoy!

Thanks for taking a peek!  You can see more of Rebekah's work on HER BLOG


Friday, July 18, 2014

Gift Jar Tutorial with Tracy McLennon

Curtsey Boutique Project Instruction Page
Decorative Gift Jar
Original Design : Tracy McLennon

Curtsey Boutique Supplies:


Other Supplies:
Hot Glue Gun
Jar with a Wooden Lid
⅛” Hole Punch
Double Sided Tape
Patterned Paper
Pom Pom Ribbon by May Arts
IMG_0692EB.jpg

This Decorative Gift Jar is the perfect way to present any little gift of appreciation. You could fill your gift jar with freshly baked cookies, candy, a pretty piece of jewelry and so much more. There are always times where you need a sweet and simple gift for someone. A hostess gift, a friendly neighbor, or for someone you think could use a little pick-me-up.

The first thing you will need to do to create this project is gather your materials (listed above).
IMG_0669A.jpg
Step 1: Using the ⅛” hole punch, punch a hole in your chalkboard heat and run the red and white baker’s twine through.
IMG_0672B.jpg
Step 2: I used my hot glue gun to add my large decorative button to the Red & White Polka Dot Ruffle Flower.
IMG_0674B.jpg

Step 3: Again I used my hot glue gun to attach the white pom pom ribbon to the wooden lid of the jar.
IMG_0676B.jpg
Step 4: I adhered the coordinating patterned paper to the jar using regular double sided tape.
IMG_0677B.jpg
Step 5: The final touch is to adhere the ruffle flower and the chalkboard tag to the lid, again using hot glue. Taaaa Daaaa! You have a beautiful package for that sweet little something for someone special.
IMG_0688B.jpg

IMG_0690B.jpg

IMG_0692EB.jpg


The Curtsey Boutique is an artisanal shop specializing in handcrafted and supply items that add a touch of whimsy and vintage inspired delight to home decor, crafting, wedding, special events and celebrations of everyday joy.  These project sheets are for the use of our customers and wholesale clients. They may be shared on the internet with proper credit and a link back to the Curtsey Boutique blog or shop. They are not to be used for resale, distribution or to be edited and redistributed in any way.


Curtsey Boutique Blog: www.theserendipitousscrapper@blogspot.com

Friday, June 20, 2014

DIY Nesting Boxes Tutorial with Connie Mercer


DIY Nesting Boxes Tutorial
Curtsey Boutique Designer
Connie Mercer

Connie shares a fun tutorial in which she alters our kraft boxes to make a lovely set of nested gifts.

1.  Pick the papers you wish to use. You will need 7 for each box.
2.  For the 2” box you will need to cut 7 at 1 ¾” X 1 ¾”.  Ink around each paper for shading.


3.   For the 3” box you will need to cut 7 at 2 ¾”X2 ¾”.  Ink around each paper for shading.
4.  For the 4” box you will need to cut 7 at 3 ¾”X3 ¾”. Ink around each paper for shading.
5.  Put those aside and ink up all edges of all 3 boxes.


6.  Next step is adhere the papers to each side.
7.  You will have one paper of each size left.  That one goes on the inside bottom.


 You are ready to decorate the front of the boxes.
  The fun part is deciding how you will use them.  They can be stacked, nested or used as storage boxes. 


Curtsey Boutique Supplies


Other Supplies:
Graphic 45 papers
Archival Brown ink (for shading)
Tape adhesive
Wet Glue

To see more of Connie's lovely work be sure to visit her blog by clicking on her image below.