Showing posts with label Baker's Twine. Show all posts

Friday, November 14, 2014

Love you Lots Layout with Tracy McLennon

Love you Lots Layout
Curtsey Boutique Designer
Tracy McLennon
 Tracy shares how she incorporates our dyed doilies into scrapbooking today. Her lovely multi-tone border highlights the muted tones of her layout and coordinates beautifully with our baker's twine.  She includes her journal on one of our half sized library cards.


Curtsey Boutique Supplies


You can see more of Tracy's designs by visiting her blog.


Wednesday, September 10, 2014

Doilies on Layouts with Lisa Spiegel

Doilies on Layouts
Curtsey Boutique Designer
Lisa Spiegel
Lisa loved using Curtsey Boutique products on her layouts.  They add so much depth to simple paper products. For this layout, she used the White 4" Doilies, the Yellow Dyed Doilies, a Polka Dot Embossed Glassine Bag, a yellow library card, yellow twine, cream seam binding, a cream felt flower (that she misted green), a heart stick pin, a Shabby Chic vintage mini clothes pin and a Shabby Chic wood button.  All of these products make for one pretty layout!!

Curtsey Boutique Supplies


To see more of Lisa's lovely work click on her image or link below.


Tuesday, September 9, 2014

The Best Day Layout with Connie Mercer

The Best Day Layout
 Curtsey Boutique Designer
Connie Mercer
Connie shares a lovely layout featuring a mix of neutral colors and strong patterns. I love her combination of textures, patterns and colors in the upper right corner. The layering of tags is a delight for the eye to take in.


Curtsey Boutique Supplies


Bakers twine 

To see more of Connie lovely work be sure to visit her blog by clicking on her picture below.

Wednesday, September 3, 2014

Embellished Mason Jars with Raechelle Bellus


Embellished Mason Jars
Curtsey Boutique Designer
Raechelle Bellus

Mason Jars are just everywhere in the crafting world today. Raechelle shares a simple and sweet way to dress them up.  

Pick your favorite chalk paint and coat the exterior of the jar. Sand down the raised text with a fine grit sand paper or an emery board. Then wrap the neck with baker's twine and use hot glue to add our signature rolled felt roses and shabby chic gray flowers.

Curtsey Boutique Supplies

Baker's Twine

Mini White Rolled Felt Roses

Shabby Chic Gray Flowers


To see more of Raechelle's lovely work click on her picture below.


Wednesday, August 6, 2014

Baby Boy Card with Rebekah Faries

Today we have a gorgeous baby boy card from DT Member Rebekah Faries.  Rebekah used doilies and Baker's Twine from the shop to add layers to this adorable card.

To see more gorgeous work from Rebekah, visit her blog, Midnight Lullabies.


Monday, August 4, 2014

A Layout Series with Tracy McLennon

Today, DT Member Tracy McLennon is bringing us something fun.  She has created a series of layouts, all using the same collection, and incorporating a fun variety of items from the Curtsey Boutique shop into each one.  Enjoy!

Layout #1 Supplies:


Layout #2 Supplies:


Layout #3 Supplies:


Layout #4 Supplies:

To see more of Tracy's delightful creations, click HERE.


Friday, July 18, 2014

Gift Jar Tutorial with Tracy McLennon

Curtsey Boutique Project Instruction Page
Decorative Gift Jar
Original Design : Tracy McLennon

Curtsey Boutique Supplies:


Other Supplies:
Hot Glue Gun
Jar with a Wooden Lid
⅛” Hole Punch
Double Sided Tape
Patterned Paper
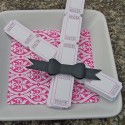
Pom Pom Ribbon by May Arts
IMG_0692EB.jpg

This Decorative Gift Jar is the perfect way to present any little gift of appreciation. You could fill your gift jar with freshly baked cookies, candy, a pretty piece of jewelry and so much more. There are always times where you need a sweet and simple gift for someone. A hostess gift, a friendly neighbor, or for someone you think could use a little pick-me-up.

The first thing you will need to do to create this project is gather your materials (listed above).
IMG_0669A.jpg
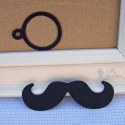
Step 1: Using the ⅛” hole punch, punch a hole in your chalkboard heat and run the red and white baker’s twine through.
IMG_0672B.jpg
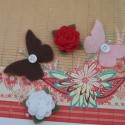
Step 2: I used my hot glue gun to add my large decorative button to the Red & White Polka Dot Ruffle Flower.
IMG_0674B.jpg

Step 3: Again I used my hot glue gun to attach the white pom pom ribbon to the wooden lid of the jar.
IMG_0676B.jpg
Step 4: I adhered the coordinating patterned paper to the jar using regular double sided tape.
IMG_0677B.jpg
Step 5: The final touch is to adhere the ruffle flower and the chalkboard tag to the lid, again using hot glue. Taaaa Daaaa! You have a beautiful package for that sweet little something for someone special.
IMG_0688B.jpg

IMG_0690B.jpg

IMG_0692EB.jpg


The Curtsey Boutique is an artisanal shop specializing in handcrafted and supply items that add a touch of whimsy and vintage inspired delight to home decor, crafting, wedding, special events and celebrations of everyday joy.  These project sheets are for the use of our customers and wholesale clients. They may be shared on the internet with proper credit and a link back to the Curtsey Boutique blog or shop. They are not to be used for resale, distribution or to be edited and redistributed in any way.


Curtsey Boutique Blog: www.theserendipitousscrapper@blogspot.com

Wednesday, July 16, 2014

Vintage Envelope Project with Rebekah Faries

Check out today's gorgeous project from DT Member Rebekah Faries!  Rebekah created these envelopes as a multi-function greeting card or gift card wrapper to keep on hand for a variety of last-minute needs.  The envelopes contain a simple die-cut sentiment that is appropriate for a variety of occasions, making this project perfect for weddings, baby showers, love notes, and more.

Rebekah wrapped some of our Glassine Envelopes with 5-Inch Doilies, then embellished them using Baker's Twine and buttons.  The result is completely charming, don't you think?

You can purchase all the items needed to make this versatile envelopes in our shop.


You can visit Rebekah's blog by clicking HERE.


Tuesday, July 15, 2014

Baby Themed Layout with Connie Mercer

Today DT Member Connie Mercer brings us a vintage-inspired layout.  When the older generations meet the youngest members of the family for the very first time, those are moments that deserve special layouts.  This layout records one of these precious moments in a families life.

Connie used these products from the shop to create her layouts:


Other Supplies:
Paper- Authentique
Letters- American Crafts


To see more of Connie's Vintage Inspired creations, click HERE.


Monday, June 30, 2014

Bath Salts Gift Bag with Rebekah Faries

Today we are sharing a delightful project that doubles as a great gift idea.  This gift bag, created by Rebekah Faries, starts with a Kraft Bakery Bag, to which Rebekah added bath salts, then made it beautiful by adding a Heart Shaped Doily, some Baker's Twine, a tag, and an adorable wooden scoop from the shop.

The shop is on vacation currently, but you can still browse these items and more by clicking HERE.  We'll be back soon!

To see more of Rebekah's lovely work, you can visit her blog HERE.


Friday, June 13, 2014

A card for Mom by Tracy McLennon

Cherish Mom Card
Curtsey Boutique Designer
Tracy McLennon
 Mother's day has come and gone and Father's day is just around the corner, but I still think its great to let mom know she is pretty amazing whenever we can.  Tracy's card is filled with amazing layers that do just that.


Curtsey Boutique Supplies


To see more of Tracy's lovely work visit her blog by clicking the link or her image below.

Friday, June 6, 2014

You Make Me Happy layout by Raechelle and our Anniversary Giveaway Winner!


You Make Me Happy Layout
Curtsey Boutique Designer
Raechelle Bellus

Black and white elements on layouts and the chalkboard feel are major trends right now.  Raechelle's added a whimsical twist with a pop of color from our blue dyed doilies and a floral pattern paper. Our die cut mustaches coordinate with the lighthearted theme of her pictures. This layout "makes me happy" too!


We can't forget about our 400th blog post give away winner.  Congratulations to Larista Rulel.  Be sure to contact at us at curtseyboutique@gmail.com to claim your prize!

Curtsey Boutique Supplies

To see more of Raechelle's lovely work be sure to visit her blog by clicking on the link below.

Monday, May 12, 2014

DIY Gold Glitter Striped Muslin Bag Tutorial with Rebekah Faries

DIY Gold Glitter Striped Muslin Bag Tutorial
Curtsey Boutique Designer
Rebekah Faries
Rebekah is big into gift wrapping lately and so for her most recent tutorial she decided to try her hand at decorating bags. Curtsey Boutique muslin bags are perfect for tucking in smaller gifts when you don't feel like wrapping with paper.

Gold seems to be the color of the moment and feathers are fun and everywhere you look in the crafting world.  Today's DIY technique teaches you how to mimic the beautiful gold glitter bands on Rebekah's bag.

The secret is using double sided quick hem tape which can be found in any sewing store.  

Regular double sided tape won't stick to fabric well, but quick hem tape is made for fabric and holds beautifully.

1. Simply decide how many bands of color you want, trim to size and adhere. 

2. Be sure to rub all over with a bone folder (or your fingers) to guarantee great adhesion of the tape to the fabric.

3. Peel off the protective paper and cover generously with glitter.

4. Press the glitter into the tape before tapping off any excess.

Voila! Mess free bands of yummy gold glitter.

Add Baker's Twine and other embellies to jazz up your bag.


Other Supplies
Double Sided Quick Hem Tape: Singer
Gold Glitter: Martha Stewart
Stamp: Feather Finery: PTI
Ink: Fine Linen: PTI
Feathers
Gold Button: Craft Supply
Date Label: MME
Love Diecut: Pink Paislee
Seam Binding: French Market
Bird Paper Clip: Michaels

Curtsey Boutique Supplies


To see more of Rebekah's work be sure to click on her image below and visit her blog, Midnite Lullabies.