Showing posts with label Lisa Spiegel. Show all posts

Wednesday, September 10, 2014

Doilies on Layouts with Lisa Spiegel

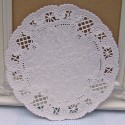
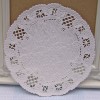
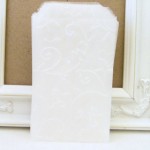
Doilies on Layouts
Curtsey Boutique Designer
Lisa Spiegel
Lisa loved using Curtsey Boutique products on her layouts.  They add so much depth to simple paper products. For this layout, she used the White 4" Doilies, the Yellow Dyed Doilies, a Polka Dot Embossed Glassine Bag, a yellow library card, yellow twine, cream seam binding, a cream felt flower (that she misted green), a heart stick pin, a Shabby Chic vintage mini clothes pin and a Shabby Chic wood button.  All of these products make for one pretty layout!!

Curtsey Boutique Supplies


To see more of Lisa's lovely work click on her image or link below.


Friday, May 9, 2014

Love Always Mommy Layout by Lisa Spiegel


Love Always Mommy Layout
Curtsey Boutique Designer
Lisa Spiegel

Have you ever pulled out a coat or purse after having not used it in awhile and discovered a $10 bill? It is such a lovely unexpected surprise. The same thing happened to me today when I was doing a bit of inbox cleaning I found one more project from Lisa that I hadn't shared yet with you - a lovely surprise!

Lisa filled her layout with doilies, a library card, vellum bag and our shipping tags. 

In her own words "I use all of these products on almost every layout I create!  I just love the subtle layering they allow and the ability to hide my journaling in the vellum bag is one of my best tricks to sharing meaningful journaling that you might not want everyone looking through your album to see."

Curtsey Boutique Supplies


Monday, April 14, 2014

Wherever You Go Bring Your Own Sunshine Layout by Lisa Spiegel

Wherever You Go Bring Your Own Sunshine Layout
Curtsey Boutique Designer
Lisa Spiegel
Layering is one of the best ways to create interest on a page, and I like to use not just paper but several types of products to create that fun layered look. I love how many there are to choose from with Curtsey Boutique!

My process goes like this...I select my photo or photos and then I usually pull all my embellishments first, trying to find some that match my photo.  Then I'll select a background paper. 


In this case, I chose a retired Sassafras Lass paper because I loved the clouds which I felt help tell the story of my photo of my daughter and her friends on a rainy day.  Then I started layering.  

First, I choose papers.  In this case, I chose a vellum and tape measure paper.  I started tucking things in like the sunshine, a Glassine bag (I cut it in half and tucked in top and bottom for the illusion of a larger bag), a doily (also cut in half and tucked top and bottom), and some tulle ribbon.  

I decided to embellish the corner of the flower girl with a Garland Flag, a doily and a Round Tag. (I thought she was so cute with her daisy umbrella and sunny disposition.  She totally echo'd my daughter's and her friend's faces while they ran to class in the rain.)   

I used my Silhouette to create my title and backed it with the polka dot paper.   I created a custom sunshine with my trusty zig zag scissors and my sewing machine and used it to highlight the word Sunshine for the title.  A few dew drops, some vellum circles and a clothespin all add even more dimension.  

The last little touch is some random thread, I love how thread softens the look of papers.  As always I added some journaling to tell my story...I just don't think a page is finished without journaling!  

I hope you've enjoyed this little look into my layering process and would love to see your take on layering..be sure to stop by our Facebook Fan page and share your pages with us!!

Curtsey Boutique Supplies


To see more of Lisa's work, click on her photo below.

Monday, March 24, 2014

DIY Berry Basket Holder Shadow Box Tutorial with Lisa Spiegel

Berry Basket Holder Tutorial
Original Design : Lisa Spiegel


Lisa shares this ingenious tutorial for creating a shadow box display piece from two of our berry baskets. 

1. Cut a slit in the first berry box, then remove the top half of the box following that line.

2. Using twine, tie the basket you cut to another full size basket creating a clam shell appearance.
.

3. Stuff a muslin bag with pillow stuffing and tuck in the bottom basket.  Hot glue red doily to the top basket.


4. Hot glue Fabric Flower, Twine tied button, Felt Flowers and Glassine Leaves punched from Glassine bag to top basket.

5. Fold Glassine bag up two times from the bottom edge.  Use stick pin to attach it to the muslin pin cushion.  Adhere wallet sized photo to the front.


6. Pull apart Red Fabric flower to reveal fabric strip.  Tie around the berry basket and embellish with pins.  Pin Burlap Butterfly to the pin cushion.  Enjoy!


Curtsey Boutique Supplies:


Other Supplies:
Pillow Stuffing
Maya Road Stick Pins
Twine


To see more of Lisa's work, click on her photo below.

Friday, March 14, 2014

Gift Card Holder Tutorial with Lisa Spiegel

Today I'm bringing you a Shabby Chic Package Tag or Gift Card Holder you can create using some simple Curtsey Boutique supplies.

You will need:

To create my tag, I first trimmed 1/2 inch off the bottom of the tag, then I wrapped the doily around the shipping tag to create a pocket and glued the flaps down with my tape runner.  I tied seam binding into two bows to embellish the tag. To create the doily flower on the front, I simply pinched the doily together.

Then punched two leaves from the Glassine Bag and attached them to the flower with a mini stapler. I then wrapped the bottom in washi to secure the layers and hide the staple.

This flower was attached to the front of the pocket and I added a couple of paper flowers from my stash as well.


 The final touch was a two layer Glassine butterfly that I punched from the bag and stapled together.


Thanks for stopping by today!  

To see more of Lisa's work, click on her photo below.


Thursday, February 13, 2014

Valentine's Day Banner with Lisa Spiegel


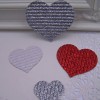
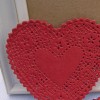
Valentine's Day Banner
Curtsey Boutique Designer
Lisa Spiegel

Lisa shares a  quick and easy Valentine's Banner today. Using Curtsey Boutique twine, doilies, vintage keys, clothes pins, and glitter cut embellishments and a bit of glue she created a cute new layer for her mantle decor for the month of February.  


Curtsey Boutique Supplies


To see more of Lisa's amazing work, visit her blog by clicking on her photo.

Tuesday, December 24, 2013

Brown Paper Packages Tied up with String with Lisa Spiegel

Brown Paper Packages Tied up with String
Curtsey Boutique Designer
Lisa Spiegel
Did you catch the Sound of Music remake with Carrie Underwood? I love this musical and and what could be a better tribute than Lisa's tutorial sharing how to make a brown paper package tied up with string using just a few of her favorite things from the shop?


1) Using Dauber Paint, stamp bag with dots 


2) Staple various ribbon lengths together and then to doily 
3) Stamp desired message and add to snowflake rosette using a pop dot.


4) Using double sided tape, add snowflake rosette to doily and ribbon 
5) Fold top of bag and tie shut with twine.


6) Using double sided tape, add doily to package. 

Curtsey Boutique Supplies


To see more of Lisa's amazing work, visit her blog by clicking on her photo.