Tuesday, January 14, 2014

We are on Vacation!!


The shop is taking a bit of a rest following the holidays and we will be reopening in February.

If you have any questions about past or future orders feel free to email us at: curtseyboutique@gmail.com

Thanks so much,

CarrieAnne

Friday, January 10, 2014

Project Life Week #1 with CarrieAnne

Week #1 Project Life Layout
Curtsey Botuique Designer
CarrieAnne DeLoach

 One of my New Year's resolutions is to successfully complete a Project Life album this year.  One thing that has always gotten in my way in the past is my dislike of my handwriting. I could of course print everything on the computer, but that has a tendancy to stop my momentum and than the layout stalls and than it just doesn't get finished.


So this year, I've decided to get over it - my handwriting, is my handwriting and that's that!  I love how easy our shipping tags make journaling and there are a few of them and our mini library cards on this layout.

This week was quite busy for us as we had out of town family visiting, a trip to a friends for New Year's Dinner, unpacking tons of boxes at our new house, football bowl games to watch and a trip to the Varsity - an Atlanta diner that is a landmark.

Close up of the left side...


Close up of the right side ...


Curtsey Boutique Supplies


Wednesday, January 8, 2014

DIY Jute Organizer and Burlap Bag Dispense Tutorial by Connie Mercer


We all love to use Jute in our projects, but storing and keeping it kink and not free is not always easy. Connie has stylishly mastered this organizational conundrum and is sharing her burlap organizer tutorial with us today.


Curtsey Boutique Supplies


Monday, January 6, 2014

Man and Wife Card by Rebekah Faries


Man and Wife Card
Curtsey Boutique Designer
Rebekah Faries
It is snowing in Georgia this morning! I can't believe it. For us flurries are a very rare thing - we didn't see a flake last year and I'll be honest I'm no fan of the cold or shoveling.  

This lovely card by Rebekah, however just warms my heart and makes up for the dismal weather. Showcasing our corrugated silhouettes and doilies, a sweet shower of confetti hearts are the perfect finishing touch.

Curtsey Boutique Supplies


Thanks for taking a peek!  To see more of Rebekah's work, visit her blog by clicking on her photo below.

Thursday, January 2, 2014

Altered "Love" Embroidery Hoop by Jenifer Cowles

Altered Love Embroidery Hoop
Curtsey Boutique Designer
Jenifer Cowles


A quick walk through my local department stores this week revealed that everyone is getting ready for Valentine's Day. It seems scarcely possible with the ground still littered with fire work remnants, but there it is - red, pink and white hearts everywhere.

I thought we'd hop on the band wagon instead of fighting the love avalanche. Jenifer's altered embroidery hoop is a charming decoration to hang at home or give to a friend.


Curtsey Boutique Supplies


Thanks for taking a peek today!  To see more of Jenifer's work, please visit her blog by clicking on her picture below.

Tuesday, December 31, 2013

Hand Painted Muslin Gift Bag by Kim Stewart

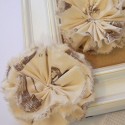
Hand Painted Muslin Gift Bag
Curtsey Boutique Designer
Kim Stewart

 Headed to a New Year's Eve party and need to give the host or hostess something with a bit of sparkle?  Kim hand painted the stripes on our muslin bags with a metallic finish acrylic paint. She topped the bags off with colorful sewn pennant.


Our muslin bags can be found here in the shop:


This year has been a wonderful one here at the Curtsey Boutique and we can't wait to see what next year brings.

Be safe and have fun tonight!


To see more of Kim's work, visit her blog by clicking on her photo.  Thanks for dropping by.

Thursday, December 26, 2013

DIY Tag Banner Tutorial with Connie Mercer


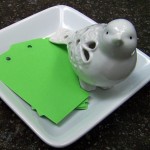
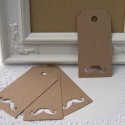
DIY Tag Border Tutorial
Curtsey Boutique Designer
Connie Mercer
Connie shares quick and easy instructions for creating the tag border on her layout above. A great project to use up all those left over holiday tags.

1. Select 5 tags, 1 envelope and 1 mustache tag.  Ink around the edges if you like.


2. Use a hole punch to punch a small hole in the flap of the envelope.

3. Adhere a small piece of black cardstock behind the mustache tag.
4. Tie the orange twine on the tags and arrange them to your liking.


5. Adhere the tags to the page and add  decorative trim to the top of the banner/border.


Other Supplies:
Authentique/pattern paper
Bazzill/cardstock
October Afternoon/stickers
Graphic45/black trim
Queen & Co./yellow pearls

Curtsey Boutique Supplies


 You can see more of Connie's lovely work by clicking on her photo.