Showing posts with label October Afternoon. Show all posts

Monday, September 10, 2012

Cowboy First Birthday Layout & October Afternoon Sketch Challenge

Cowboy First Birthday Layout
Serendipitous Scrapper
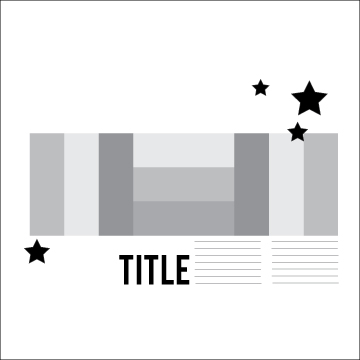
It feels like forever since I've done a 12x12 layout. October Afternoon posted a sketch challenge on their blog here and it was just the thing to get me motivated.  I love the blocking technique they showcased in the sketch and that you can use up lots of scraps with it.


October Afternoon Sketch Challenge
6 September 2012


I primarily used the October Afternoon Sasparilla line throughout the layout.  I've really come to love their Miscellany packs that have all sorts of neat items in them. Several of the buttons, the cowboy flash card and the sheriff's badge come from the Miscellany pack.

The sheriff's badge and corrugated alphabet were both in Kraft and I painted them to match the colors in the pattern papers.  I made the paper rosette and little vintage tag at the bottom with 22 stamped on it (his birthday).  Stampin' UP So Saffron ink was used to distress the tiny embossed stars, the edges of the layout and the doily. Who says you can't use a doily on a boy's layout?

I thought the cross stitch borders was a fun way to finish it all off.

It's about time I started scrapping some of Reid's first birthday photos as his second birthday is only 2 weeks away - go figure!


Wagons west,

CarrieAnne


Tuesday, September 4, 2012

Project Life Journaling Cards with October Afternoon


I've been creating lots of Project Life Journaling Cards. They are a quick way to satisfy my creative cravings without having to sit down and create a whole layout. Little Man has finally decided to give the "sleeping" concept a try and I've felt guilty using that block of quiet time for crafty purposes. I'm so behind that what was supposed to be "Spring Cleaning" has now become my "Fall Frenzy".

I used October Afternoon products throughout. I love their patterns and versatility. I know that these cards will go with just about anything, especially the pictures I just took of the kids for their first day of school. 

The cork bow is my favorite. I had no idea if it would die cut properly or hold up to the bending and it did both. Now I wondering where to get more cork cheaply and what else I can do with it!
Uncorked,

CarrieAnne

Sunday, October 16, 2011

Mom Sleeping Sign - An antidote to doorbell torture

Mom Sleeping Sign
My son is a fantastic sharer - he hates sleeping and feels a strong desire to deny me its rejuvenating benefits as well. He is currently on a schedule in which he sleeps from about 5am to 8:30am and then if he is feeling generous he'll take an hour or so nap around dinner time. I've taken him to the pediatrician just to make sure he's not a vampire, or some kind of bizarre nocturnal mutation and all she did was chuckle and shake her head in that "stinks to be you, and there's nothing I can do to help" type of way. Why is it we have to pay a co-pay again if they don't actually provide a solution to your problem? You'd never go in and order food at a restaurant, pay and not actually eat something.

But I digress...

I'm not quite sure how my 12 month old is functioning, I feel like a garbage compacter that mated with a tornado - devastated and not to good looking or smelling. (How do you shower when your now mobile infant never hits the pause button?) I have become obsessed with snatching a few moments of sleep whenever and wherever I can. Did you know a microwave situated above your stove doubles as a vertical pillow?

So woe be it to any kindly delivery man or neighbor should they lovingly ring the door bell when my son accidentally nods off for a nano second. I'm fairly certain my local flower delivery man checked to see if I was on the FBI's most wanted list after the not so happy reception he got when he attempted to play Chop Sticks on my door bell last week. To make it worse he didn't even have the right door! I think he should have given me the two dozen roses as an apology, but perhaps he was to scared to offer them to me.

So to spare delivery men, government employees and poor college kids trying to sell magazine subscriptions from future harm, I made this sign to hang over our door bell.

I know they normally say "baby sleeping," but I pride myself on honesty and accuracy.

A sleep deprived pseudo human,

CarrieAnne

Recipe:


Cricut Cartridge: Sweethearts, Sugar and Spice
Embossing Folder: Cuttlebug: Textile Textures
Ribbon & Lace: May Arts
Cardstock: Couture Cardstock
Chipboard: Maya Road
Alphastickers: Jillibean Soup, October Afternoon, American Crafts
Patterned Paper: Crate Paper, October Afternoon, Jillibean Soup
Ink: VersaMark
Twine: The Twinery
Adhesive: Beacon Adhesives Zip Dry, Glue Dots, Stampin' UP! Dimensionals


Cuts:
Sleeping Mom
"1stKiss" cut from the Sweethearts cartridge at 6 inches from fleshtone cardstock.
"1stKiss" with Layers function selected  cut from the Sweethearts cartridge at 6 inches from brown and vanilla cardstock, and green polkadot patterned paper.

Bed -
"Naptime" cut from the Sugar and Spice Cartridge cut at 4.5 inches from ecru cardstock
"NapTme-s" cut from the Sugar and Spice Cartridge cut at 4.5 inches from blue and ecru striped patterned paper
"NapTme-s" cut twice with the layers function selected from the Sugar and Spice Cartridge cut at 4.5 inches from red cardstock
"Naptime" cut twice with the layers function selected  from the Sugar and Spice Cartridge cut at 4.5 inches from floral print patterned paper

Circle Background -
With Real Dial Size selected use the "Hugs-s" cut set at 8 inches from the Sugar and Spice Cartridge

Wednesday, October 12, 2011

Graduation Cap (Mortarboard) Gift Box

Graduation Cap Gift Box with Happy Hauntings Cartridge
  You probably looked at the heading to this post and wondered whether I was aware that we are full into Fall and not Spring's graduation season. Well, while working on a Halloween project I will be sharing with you later, I came across the 3d cemetery box in the Happy Hauntings cartridge and the shape of it spoke to me.

It said "Don't I look just like a graduation cap box if you remove the tombstones, creepy hand, tree, etc."

And my crafty self replied, "Why yes, yes you do."

I was afraid if I didn't try the idea out right away I would forget about it. This was sooo easy to do and I can't wait till Spring when I can make lots of them. Never one to miss an opportunity to do something different, I choose vintage Crate and October Afternoon papers to add a little personality to this traditional blah piece of celebratory apparel. The mortarboard top is attached to a flap on the box and lifts up to open. I secured it with a glue dot to keep it closed. This would be fun for a gift card or any small gift.

Recipe:
Mortarboard Gift Box Top view
Cricut Cartridge: Happy Hauntings
Brad: Imaginisce I-Top Tool
Patterned Paper: Crate Paper, October Afternoon
Trim: The Girls Paperie
Pearls: Recollections
Floss: DMC (black)
Adhesive: Beacon Adhesives Zip Dry, Glue Dots
Stickers: Karen Foster
Chipboard: Misc.

Cuts:
Box Base
"3DBox" cut from the Happy Hauntings cartridge cut at 11.5 inches from black toile patterned paper.

Thanks for stopping by,

CarrieAnne

Tuesday, September 13, 2011

Milk Bottle Birthday Treat with Cricut Craft Room

Cricut Craft Room Milk Bottle Birthday Treat
 Have you played with the new Cricut Craft Room yet?  I requested a login to be a Beta Tester and I LOVE IT!!!!

It's great that I can search for an image on any cartridge using a regular search engine function. I popped in "milk" and it gave me anything having to do with milk on every cartridge ever made. You can limit your search to Imagine Cartridges, Cricut Cartridges and other parameters.

The Craft Room welds whenever items touch instinctively (unless you set it not to) and manipulating images is SUPER easy. Every project saves in a file that preserves not only the cut sizes, but your cut settings as well.

Have I mentioned I LOVE this product yet - especially that it is completely FREE!!!
Milk Bottle Treat Side

I made this little milk bottle birthday treat by welding the milk bottle from Create a Critter together and putting a bone in at the bottom between bottles to create a piece to fold. The bottle is made from transparency and then I did chocolate layers, because the treat is one of those straws you place in white milk that turns it into chocolate milk when you suck it.

There is a bit of Epiphany Crafts goodness in the form of a round 14 epoxy and vintage setting as well.

Recipe
Cricut Cartridge: Create a Critter
Embossing Folder: Cuttlebug: Swiss Dots
Tools: Epiphany Crafts (Shape Studio Tool Round 14)
Epoxy: Epiphany Crafts (Bubblecap Round 14)
Setting: Epiphany Crafts (Vintage Settings: Tea Room)

Patterned Paper: October Afternoon
Stamp: Craft Secrets
Ink: Stampin' UP!
Pearl: Recollections
Cardstock: Stampin' UP!
Stickers: October Afternoon (pennant), Webster's Pages (alpha)
Ribbon: American Crafts
Border Punch: Stampin' UP!
Adhesive: Beacon Adhesive: ZipDry, Stampin' UP! (glue dots and dimensionals)
Milk Bottle Treat Back
Transparency: Office Max
Floss: DMC (pink)
Straw Treat: Got Milk?
Buttons: Stash.

Cuts

Milk Carton: 4.7 inches 
The "Milk" cut from Create a Critter - cut four times (twice from transparency, twice from brown cardstock)


Dog Bone (hinge between bottles on bottom): 1.7 inches
"Terrier" cut from Create a Critter with shift and Layer 3 selected

Thursday, June 16, 2011

"In God we Trust" 4th of July Card

As a veteran married to a veteran who is the daughter of two veterans and the grand daughter of veterans patriotic holidays are a big deal in our family. I wanted to make a few cards for the 4th of July and here is the first one I came up with last night.  I love the "A Child's Year" cartridge, but rarely use the silhouettes as silhouettes.  Instead, I cut them a bunch of time and create my own layers with different colors of cardstock and by adding little details like the belt, shirt color, hair and pant leg cuff.


Have a fantatic weekend and be sure to check back on Tuesday for my last post with My Pink Stamper - I can't believe the 6 months have flown by so quickly and our DT term is already up!

Recipe:
Cricut Cartridges: A Child's Year, Tags, Bags, Boxes and More, Plantin Schoolbook
Embossing Folder: Cuttlebug: Swissdots
Patterned Paper: Graphic45, October Afternoon, Prima, Miss Arts Papercrafting School: Ruth's Recipe Kit
Dies: Nestabilities Circles: 3," 2.25" 

Star Punch: EK Success
Lace: Wyla
Adhesive: Zip Dry, Glue Dots, Tombow Aqua Liquid Glue
Buttons: Misc.

Cuts:
A Child's Year: "4July2-s" cut at 2.5" from white, peach, brown, gray, black, and white cardstock, blue star patterned paper, and yellow patterned paper

Tags, Bags, Boxes and More: (round card base) "circle" cut with "mirror" function selected at 2.75 inches

Plantin Schoolbook: "star" cut at 6.5"

Thanks for stopping by,

CarrieAnne

Wednesday, January 12, 2011

The Gargoyles of Notre Dame


When I was in Paris a few years ago I fell in the love with the architecture, the sculpture and the beauty of the city's many classically designed buildings. Notre Dame was no exception. I found the gargoyles of the cathedral especially inspiring as they managed to be stunningly beautiful and almost scarily ugly at the same time. I based this layout on the Sketchy Thursday sketch challenge for this week. I wanted to mimic the "pretty ugly" of the statues so I combined flowers with a strong yellow and black color combination - not one I would normally use. I think it came out pretty neat though.


The patterned paper is a mix of Pink Paislee, Making Memories, and October Afternoon. I made the lollipop flowers using a variety of circle punches from Marvy Uchida and Stampin' UP! The title is done with Thickers from American Crafts and stickers from Making Memories. The bling and pearls are Prima.

Thanks for looking,

CarrieAnne