Pages

Monday, October 28, 2013

DIY Halloween Glitter Candy Corn Pine Cones Tutorial by Andrea Amu

Candy Cones Tutorial by Andrea Amu
One day while I was glancing at some pine cones that the daycare children at my work painted, I got an insane idea to paint up some cones of my own to look like candy corn!  Thus, the creation of Candy Cones! 
  

DIY Halloween Glitter Candy Corn Pine Cones
Curtsey Boutique Designer
Andrea Amu

Here I first gathered my supplies.


 Then I got to work painting 3 different pinecones each with sections of white, orange and yellow acrylic craft paint.

Allow each cone to fully dry. 

Apply a heavy coat of spray adhesive to each cone.  (Work on one cone at a time until each is completely finished with next step of glittering).

You'll want to make these cones look as sweet as candy... sugar them up with some glitter!  I used plenty of Diamond Dust glitter by FloraCraft for these cones. 

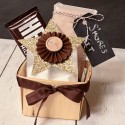
Now you will need a fabulous container to display these festive cones.  I chose to use a wood berry basket from Curtsey Boutique!  I've embellished mine with a strip of tied on burlap and I've hot glued on two Curtsey Boutique flowers and a burlap star. 

I've also taken a strip of Curtsey Boutique's kraft masking tape and I've stamped Antique lettering on it with the words, "Candy Cones!". Apply the strip to a burlap tag and tie off onto the basket to complete. 


Looking sweet! 
Supplies-
Pinecones
Acrylic Craft Paint
Orange Raffia (to fill in basket)
Spray Adhesive
Glitter
Ink
Alpha Stamps
Curtesy Boutique Products


For more of Andrea's beautiful work, click on her photo to visit her blog.

Friday, October 25, 2013

Halloween Treat Bags with Jenifer Cowles


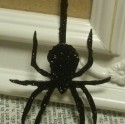
Jenifer share a sweet Halloween Treat bag today. She made a couple of these for the special neighbor kids on the block. To make them less scary Jenifer added some fun polka dots and layered on some ribbons. Our new glitter spiders are making their first appearance on the blog, as well as, an old favorite our pennant stickers.


Curtsey Boutique Supplies


Wednesday, October 23, 2013

Fairy Fun Halloween Layout with Lisa Spiegel

Fairy Fun Halloween Layout
Curtsey Boutique Designer
Lisa Spiegel


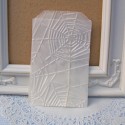
Lisa shares a spectacular Halloween layout today that is nto the least bit spooky. She hid the journaling about her daughter's fairy costume on the tag she tucked in the first spiderweb embossed envelope.

She really loved how these envelopes fit wallet sized photos perfectly as little photo mats and that they were super easy to tuck the journaling inside!


Also did you notice our new product sneak peek? 

Aren't these fabric numbers fun - fabric on one side for texture and beautiful color, cardstock on the other for ease of use. Keep an eye out for them to be making an appearance in the shop soon.

Curtsey Boutique Supplies


To see more of Lisa's lovely work be sure to visit her blog, Just a Slice Please, by clicking on her picture.

Tuesday, October 22, 2013

DIY Twine Organizer Tutorial with Connie Mercer


DIY Mason Jar Twine Organizer Tutorial
Curtsey Boutique Designer
Connie Mercer
Have you ever had a Monday that just flew by so quickly you were into Tuesday before you realized it was gone?  That was my life yesterday and I completely skipped posting on the blog. To make up for it today we are having a twine tutorial Tuesday (say that three times fast!)

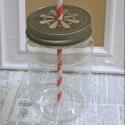
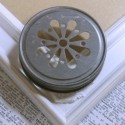
Connie's Tutorial on organizing Twine using our brand new plastic mason jars and daisy cut lids is just too clever.

Curtsey Boutique Supplies


DIY Twine Organizer

1. Untie twine and prepare to roll on vintage spools.


6. You are ready to decorate your tag and tie the ribbon on.


Other Supplies

Vintage Thread Spools
Button
Scraps of Pattern Paper/ Trim
Black Ink: Quick Quotes
Alpha Stamp Set: Bo Bunny

To see more of Connie's amazing work be sure to visit her blog, Crafty Goodies, by clicking on her image below.


Friday, October 18, 2013

Rebekah Faries' Birthday Card

Happy Birthday Card
Curtsey Boutique Designer
Rebekah Faries


Happy Friday!

We are starting the weekend off right by sharing Rebekah's first project of her DT term with you. I love the layers of doilies she used and the vintage feel of this card. It would be great for so many different loved one's and friends
.


Curtsey Boutique Supplies


To see more of Rebekah's lovely work be sure to click on her image below and visit her blog, Midnite Lullabies.

Wednesday, October 16, 2013

Gift Packaging with Kim Stewart

For You Packaging
Curtsey Boutique Designer
Kim Stewart
I am excited to introduce Kim Stewart and her lovely artwork to you. Her first project is this sweet packaging set.

"I always like to keep a stash of little altered tags around for gifts and things. They are perfect for adding little hearts, some machine sewing, stickers, you can even stamp and paint them!  For this project I added a few altered tags and a flower all held together with a cute clothespin." 

Curtsey Boutique Supplies


To see more of Kim's wonderful work visit her blog, Happy Like Yellow, by clicking on her image below.

Monday, October 14, 2013

90th Birthday Card with Andrea Amu

Happy 90th Birthday Card
Curtsey Boutique Designer
Andrea Amu


My Great Uncle is celebrating his 90th Birthday this month and I wanted to create a special card for this milestone!  


There wasn't more of a perfect place than my Curtsey Boutique stash to go searching for the best vintage inspired elements to decorate this card! 

Other supplies include:
Cardstock- Core'dinations
Patterned paper: Bella Blvd.
Cricut Expression: Font-topia and Chalk-Board Letteringcartridges

Curtsey Boutique Supplies


For more of Andrea's beautiful work, click on her photo to visit her blog.